Thursday, August 16, 2012

Tea Party

My oldest daughter, Joy and her daughter Gabby invited me and another of my granddaughters to a tea party at BabyLand (The Cabbage Patch Hospital). 


Everyone was instructed to wear hats so hats we wore!


 Joy and Gabby

 Faith


Faith and Gabby


 The Diningroom


 Gabby with her babies


 Tea Time!
 Everyone had a gift at there place setting


Gabby-taking the Cabbage Patch Oath


Gabby's new Cabbage Patch Baby that she named Ashley


Family Vacation

Good morning...it's 4:49 am and I've been up since around 1:30 am!  I hate it when I can't sleep!!

I've been looking at photo's (for lack of anything quieter to do; hubby and the furbabies are still sleeping) and I wanted to share some vacation photos with everyone.

We went to Saint Augustine, FL.  The beach there is so beautiful...white sand and the ocean is so blue.
We visited with all of my husbands cousins, nieces, nephews and there families, did some shopping and ate lots of fresh seafood.  Two of our daughters and there families came for a few days so that was extra nice.

Ashley, Nana, Papa, Joy and Gabby


Gabby and Ashley


Gabby and Nana


Nana and Papa


Ashley and Nana


The Ocean


I hope we can go back soon!

Thursday, July 19, 2012

Vacation!!

My husband and I are leaving for St Augustine, FL on Saturday for a week long, much needed vacation.  I'm so overwhelmed with all the preparations!  I have to do the laundry, clean the house, leave instructions for the pet/house sitter, bathe the dogs (all five of them) get the oil changed and the car washed,  take my Mom to her doctor appointment, pick up our prescriptions and pack (ugh).
All this in two days and get myself ready!!  I think i can, I think i can...Is there an app for all that?
Anyway, it'll all be worth it once we're lying on that white sandy beach watching the waves roll in.  Just the thought of that calms me,  We'll be staying with my husbands cousin and his wife.  There empty nesters like us and we'll visit other cousins and friends while we're there that we haven't seen in over five years.  I'm so excited!!  We love St Augustine.

Wednesday, July 18, 2012

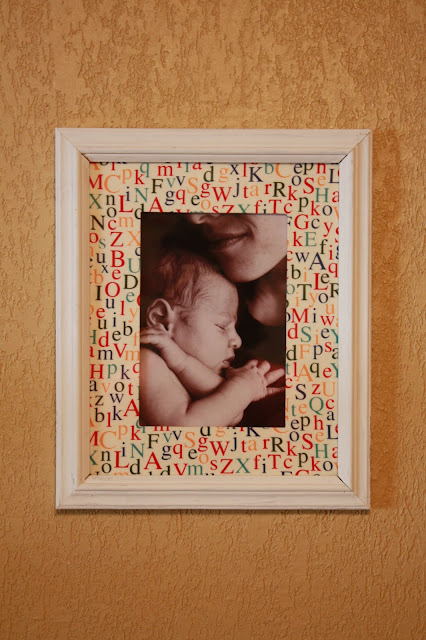
FABRIC COVERED MAT- HOW TO

These simple fabric covered mats add big impact to a framed picture.  This tutorial is for creating a 8x10 mat that holds a 5x7 picture.


MATERIALS:
  • a rectangular piece of cotton fabric approx. 11x13 in. or a bit bigger (it doesn't have to be cut perfectly)
  • a 8x10 mat - you can either purchase a pre-cut mat or cut your own out of mat board
  • spray glue -nothing beats 3M Super 77 found at Hobby Lobby or hardware stores
  • a scissor - one you don't mind getting glue on
  • a sheet rocking knife with a thin blade... an x-acto knife/craft knife will work, too
  • Mod-podge
  • small foam brush


THE PROCESS:

1.With all your supplies laid out and ready to go, spray the back side of the fabric and the front of the mat with a generous coat of spray glue (outside).


2.Lay your glue covered fabric on a table, glue side up.  Carefully place your glue covered mat face down onto the fabric.  Make sure to center it, leaving equal portions on each side.  Press down firmly all over the back side of the mat.  Check the front of the fabric to make sure all air bubbles are out.

3.Cut off the corners of the fabric with scissors... careful to leave only a tiny margin by the corner of the mat (see close-up pic)

4.Pulling firmly, starting next to the corner, pull the fabric up over the mat, one side at a time.  Press down, smoothing out all air bubbles.

5. With your knife, cut the interior of the fabric diagonally out, starting in each corner -creating an X.  Trim edges.

6. Again, pull fabric up over the edge of the mat, starting in the corners. Pull firmly to ensure that the fabric is tight, especially in the corners. Use Mod-podge on your foam brush to help adhere, if fabric doesn't stick.  Once all edges are in place, use Mod-podge to go over the edges of the fabric for extra security and to prevent any fraying.  Also pay special attention to the outside corners.  These will need a dab of Mod-podge, smoothed down with your finger, also (second photo shows how corner should look before smoothing down).

7. Let dry thoroughly and place in frame!!
undefined

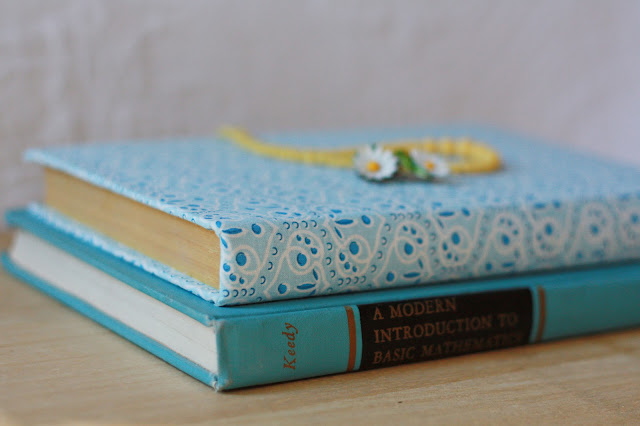
Fabric Covered Book How-To

MATERIALS


  • enough cotton fabric to cover the book you've chosen... I love using vintage fabric for old books
  • an old book, preferably one that has a blank cover, as some titles or illustrations can show through
  • spray glue -nothing beats 3M Super 77 found at Hobby Lobby or hardware stores
  • a scissor - one you don't mind getting glue on
  • Mod-podge
  • small foam brush 
(you don't need a knife... I don't know why I put that in there, Ha!)


1. Lay out your book and cut a rectangle of fabric larger than the size of your book... 1 to 2 inches larger on all sides  (you might want to iron your cut fabric at this point if it's creased or wrinkly).


2. Spray the back side of the fabric and the outside of the book with spray glue (not in the house!). Make sure you get a good coat...  and don't forget the spine of the book.  It works well to clip the piece of fabric to a wire hanger with clothes pins and stand the book, spine up, like a tent to spray.

3. Next, carefully lay your fabric out (glue side up!) and place your closed book on one end. Press book firmly down, checking to make sure the fabric is smooth and securely adhered to the book cover.


4. Carefully flipping the book over, while making sure the the spine keeps contact with the fabric, wrap the other side of the fabric around the front of the book. Once again, being careful to make sure there are no air bubbles or wrinkles in the fabric.
Your book should look like this at the end of step 4.


5. Cut off all 4 corners of the fabric, leaving about 1/8 of an inch margin between the corner and the edge of the cut.

6. Make two cuts in the fabric by the spine.  The cuts should line up with where the cover creases.  Do this on both ends of the book.


7. Smooth the fabric over the edges of the cover on all sides.  Pay special attention to the corners, making sure to pull the fabric tightly over the edges. Use Mod Podge if necessary to make sure the flaps are adhered completely.
Your books should look like this at the end of step 7.


 8. Add a very thing layer of Mod Podge to the left over tabs of fabric on either side of the spine. Then using a letter opener or a butter knife, push the tabs down into the little gap between the cover and the binding.


9. Add a little Mod Podge to the the corners of the book and use your fingers to push down the fabric (if necessary) to make a clean looking corner and keep them from fraying in the future.

Let dry and display... :) YOU'RE GOOD TO GO! 

undefined

No Hangover

life hacks

Homemade Ice Pack